Mikko asked me to contribute to this blog and every now and then I will share something from my own blog - Homerwargamer - in here. First, I would like to write about making trenches. So here goes.
I didn't take pictures of the earilest stages of the making - that's something I will revisit when I get around making intersections and shorter trench pieces - but can still describe how I did them.
At first I thought about the trenches a lot. There is a thing that cannot be overlooked, the mindwork. Don't just make them, think about it first, especially when making modular elements as my trenches: will it work compared to other pieces of the modularity; what if I put this piece backwards, would it work; etc. After I had stumbled through these things I was ready to go.
I had decided to make three triangle corners, four square corners, five pentagon corners, nine straight trenches measuring 20 cm (8'') and four gun pits that could join the trench system. From early on I had decided the trenches to have back wall too, because that models the trench being dug better than just the front - at least I think so.
I started by sawing the bases for the trenches out of hard board (recycled old table pieces) and made them 10 cm (4'') wide, which is almost 7 cm (2 3/4'') wider than the medium base. This way, I had enough room to slope the sides and fit the logs inside the trenches.
I glued the logs first. I put four bamboo barbeque sticks on the table vertically, spacing them so that the outmost sticks were 20 cm (8''), the length of the trench section, apart from each other. Then I glued four sticks (already cut to length) side-by-side horisontally. I left a small space and then repeated this as many times as there were room or when I had enough loggings (sic? - not Kenny, though, younger readers, ask your dad or watch Top Gun). After the glue had dried, I cut the log elements out with pliers. (This whole paragraph is hard to describe in words, but as said, I will revisit the subject.)
Next I cut styrofoam to about 1 cm x 2cm strips that I glued to the bases (I had carved the the edges of the bases with my Sissipuukko - google it) so that there were enough room for medium base and log elements. Then I glued in the log elements. For corners I did not make the log elements, but glued the sticks straight to the styrofoam.
 |
Finally, a picture!
|
I carved the rectangular styrofoams edges off. The coarser the styrofoam and duller the knife, the more uneven and therefore more realistic did the slope end up.
 |
When cutting styrofoam, have the vacuum cleaner standing by. If you don't and The Wife walks into the mess, they will never find your body.
|
Added some sand to the slopes and to the bottom of the trench.
 |
Sand added, stolen from the kids sand box.
|
I thought about the painting and ended up taking the easy way: I sprayed the trenches first with hardware stores "brown" (gloss, damn them) and went over it with Mil-Tec's Dunkelgelb. That's right, Dunkelgelb.
 |
Dunkelgelbed. No - coyote browned. No - beiged. No - sand browned. It's light brown, fellows.
|
I also painted some gauze bandage with olive green, so I could cut it to desired size, soak in watered down PVA and mold in place.
 |
"I think these bandages are past 'best before' -date..."
|
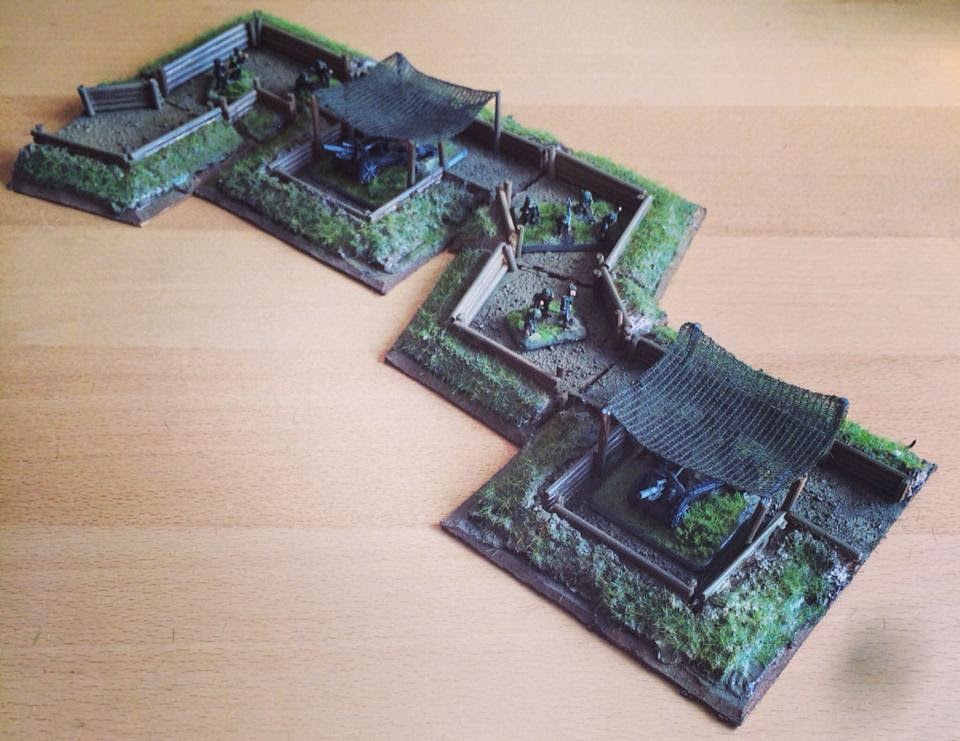
In total, I made 180 cm (6') of straight trench, add corners and that comes to total of about 340 cm (11' 2'') of trench. Plus the gun pits.
 |
Stacked trenches.
|
Of course I had to recreate a scene from a TV show on our kitchen table...
 |
Not Sponge Bob Squarepants.
|
...And then I had to play the scene from a TV show with a friend.
 |
This time around, Lipton actually blew up a gun.
|
As said, I am forced to revisit the trenches when I make the intersections. Maybe foxholes, too.
-Pete
No comments:
Post a Comment